We may earn money or products from the companies mentioned in this post.
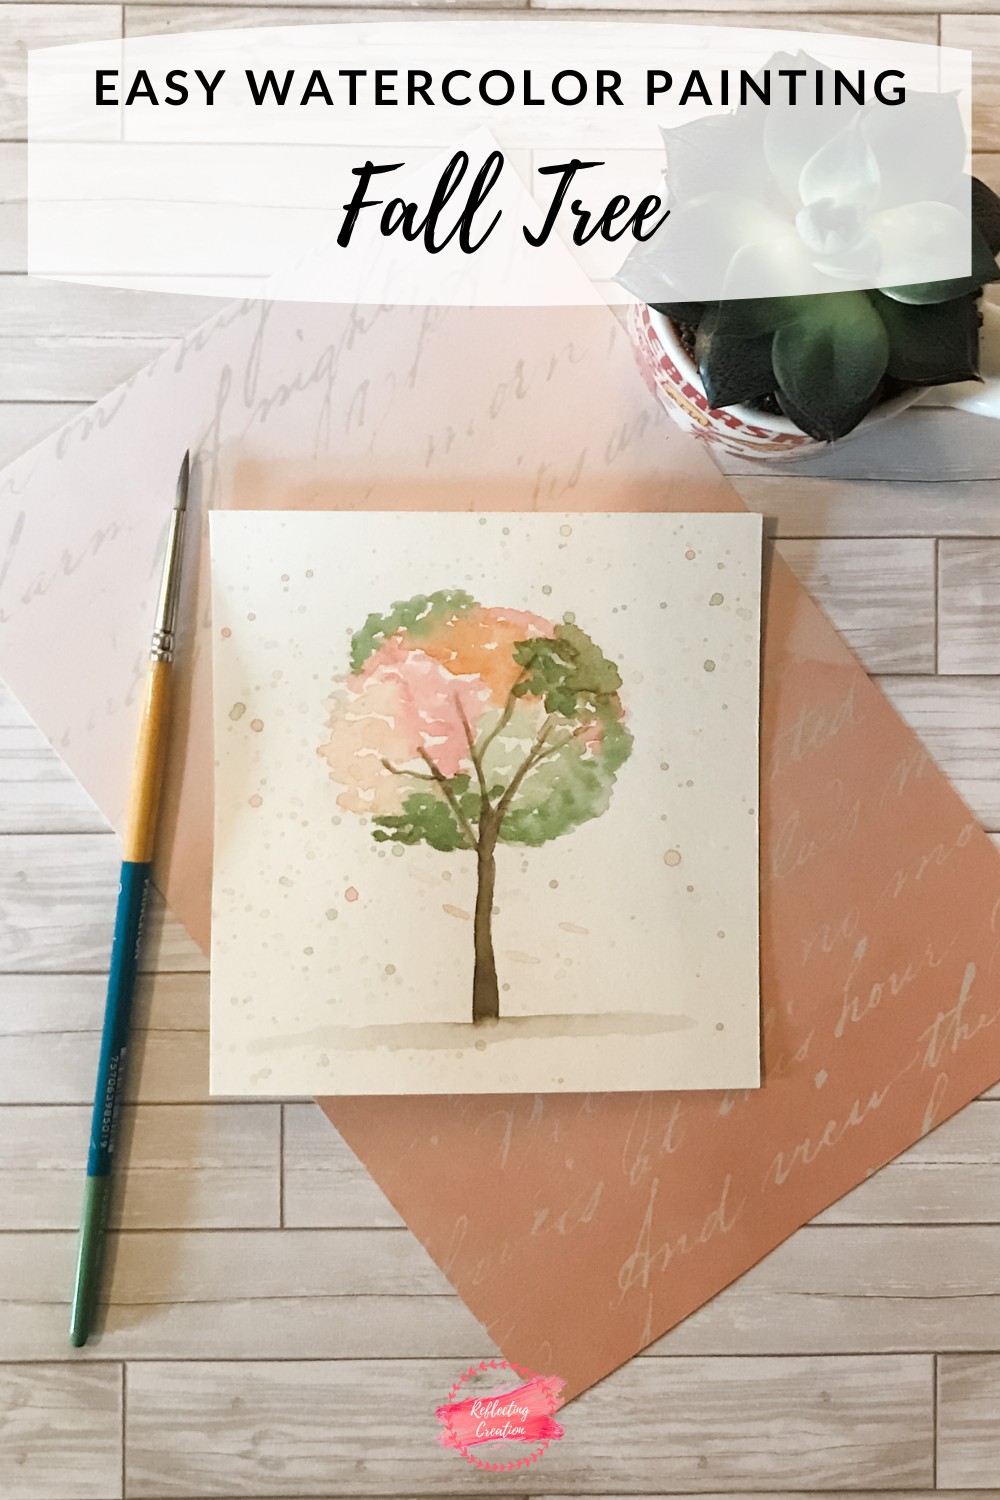
Are you ready for the leaves to change color?
I know once September hits I am ready to see all the leaves to change colors on the trees. Honestly, I have always thought it was one of the best parts of living up north. However, sometimes it takes FOREVER for the leaves to decide to change colors… So, why not make our own watercolor fall tree to help us wait for the season to catch up?
Here is a video of the painting’s whole process. Keep reading below to see this watercolor fall tree painting broken down into 3 easy steps!
What Supplies Will You Need?
- Watercolor paper
- Round paintbrush
- Watercolor paint (Burnt Sienna, Sage Green, Alizarin Crimson, Burnt
- Two cups of water
- Paper towel
If you would like to see all the art supplies I recommend, check out, “My Supplies” page. Click HERE to check it out!
Mixing Paints
Before we begin painting we need to get our paint ready and into our mixing pallet. We will only be mixing two colors together, the rest of our pallet will be even washes.
- Mix together Burnt Umber + Black. Use more Burnt Umber than Black to create a dark brown.
- Have a light wash of Burnt Sienna in your pallet. Use an even amount of water and paint to create an orange paint mixture.
- Have a light wash of Alizarin Crimson in your pallet. Use an even amount of water and paint to create a red paint mixture.
- Have a light wash of Sage Green in your pallet. Use an even amount of water and paint to create a green paint mixture.
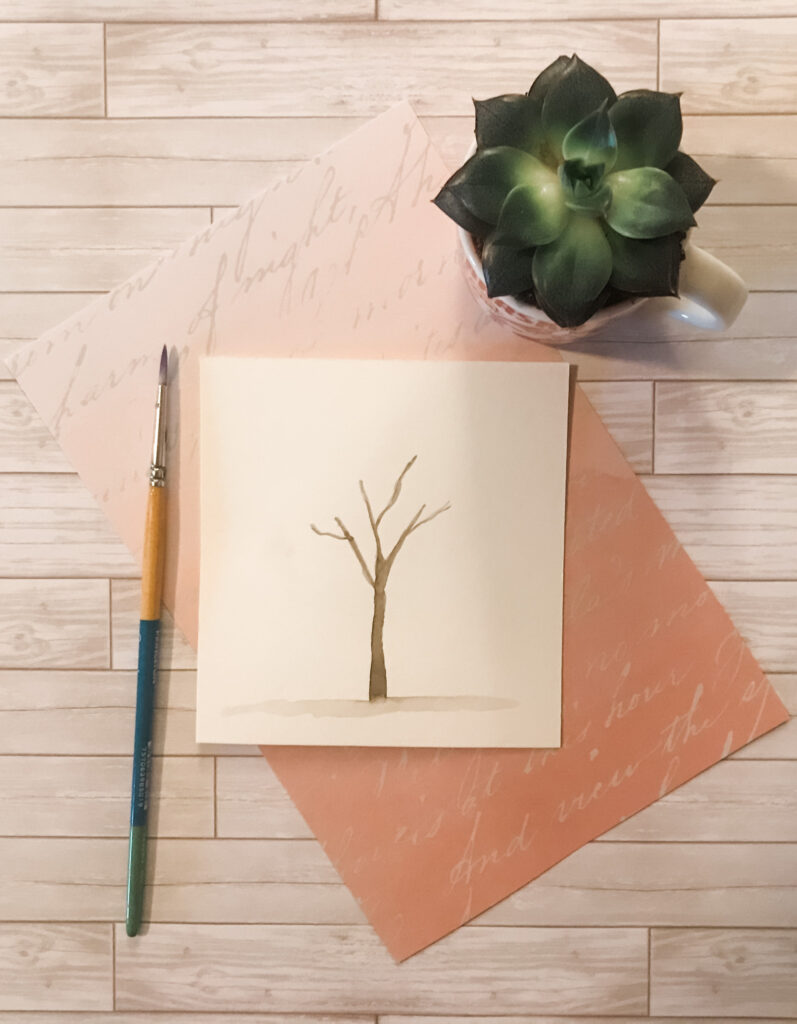
Step 1:
For our first step, we are going to create the trunk of the tree and the ground underneath the tree.
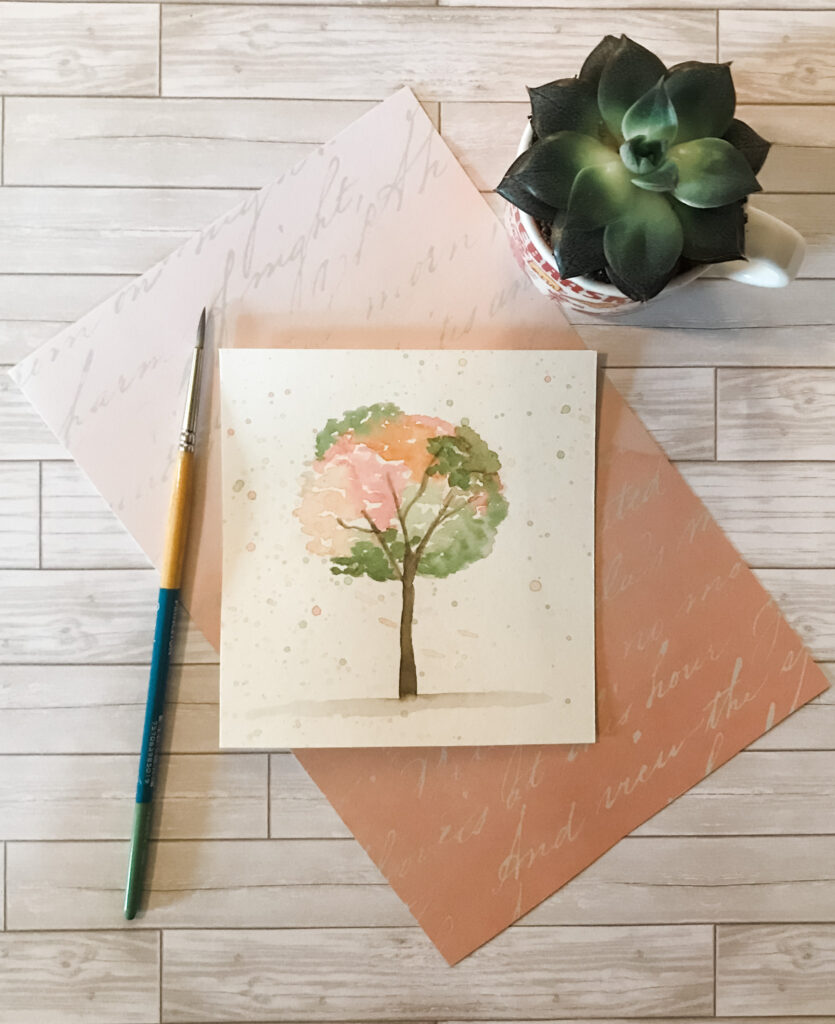
Tree Trunk: Dip your round brush into the dark brown paint mixture and begin painting starting at an inch of the way up from the bottom of your paper. The trunk of the tree should slowly get smaller as you paint upwards. To make the trunk look more realistic don’t worry about being completely symmetrical, allow yourself to make uneven bumps as you paint upward. At the top of the trunk paint in three uneven “Y” shapes. One on the left, middle, and on the right.
Ground: Dip your brush into the dark brown paint mixture and paint a small line of brown paint. Next, clean off your brush, then using clean water on your brush blend out the dark brown line underneath the tree to create the ground.
Use the picture and video below as a guide.
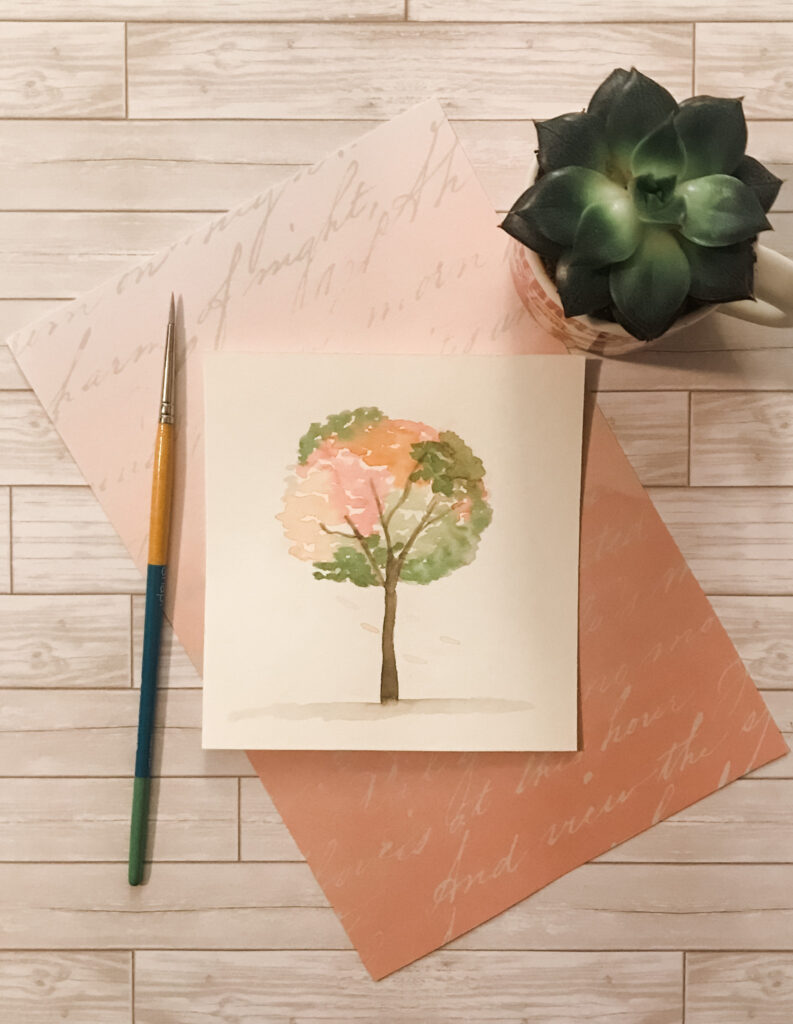
Step 2:
In this step, we are going to be using the green, red, and orange paint mixtures we created a few moments ago. We are going to start with our orange mixture. Dip your brush into the paint and begin painting by randomly taping in the paint on the far left side of the tree. Next, dip your paint into the red paint mixture and begin taping in paint right next to the orange section you just created. Above the red paint, tap in more orange paint, and then more red paint next to that. Now, dip your brush into the green paint mixture and tap it in at the base of the treetop, moving upward towards the right. Then to finish off this step tap in the green paint at the top of the left side of the tree.
Use the video and picture below as a guide.
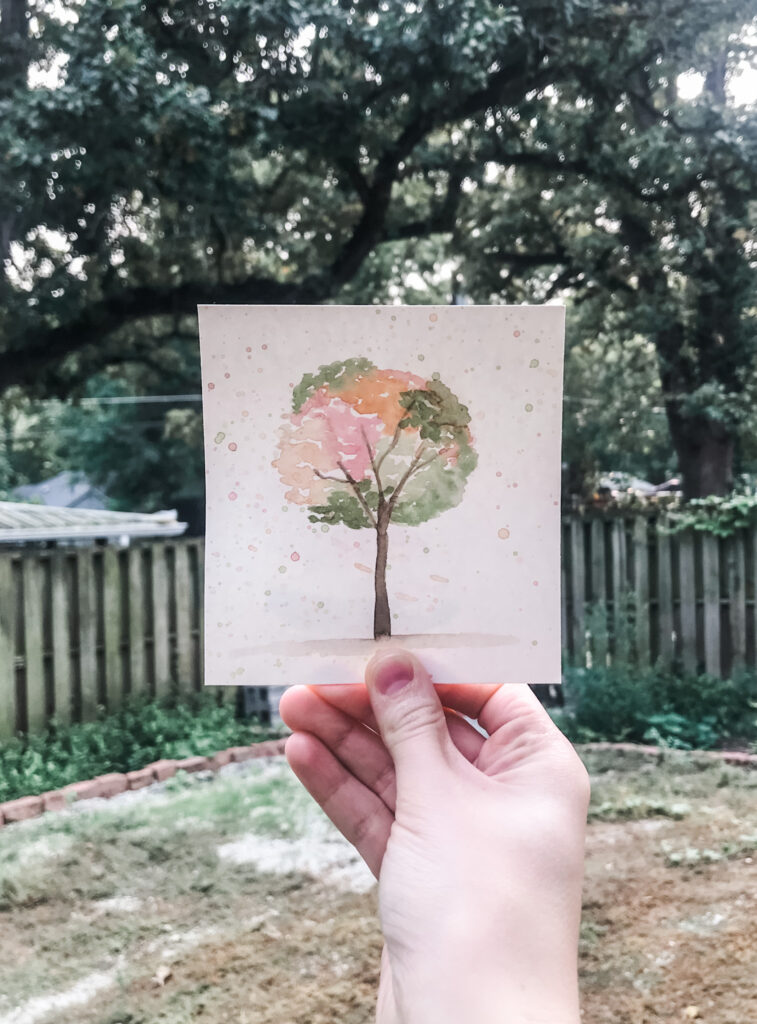
Step 3:
Let’s add splatter to our tree to make it have the appearance of fallen leaves. We are going to splatter this painting with three colors. We are going to use green, orange, and red paint.
Add a lot of water into the green, orange, and red paint mixtures we’ve already created. This will tone down the vibrancy of the colors as well as give us the ability to load our brush up with the paint.
Dip your brush into the green paint and begin taping your brush on your finger over your painting. Repeat this same action with the orange and red paint. Use your paper towel to dab off any extra paint on the tree that you don’t like.
Congrats! You’re Done!
I hope you enjoyed painting this fall tree with me. If you liked this painting you’ll also want to check out, Watercolor Painting Tutorial | Fall Pumpkins. Before you leave don’t forget to sign up for our weekly newsletter. You’ll receive a FREE color theory cheat sheet, as well as a free floral camera color sheet. Check out our social media accounts to see if you’d like to follow along and see more paintings and behind the scenes photos. Leave a comment below letting me know what you would like to paint next.
If you are an artist like me and would like to share your own ideas on your own blog, check out Blogging Blastoff. This is a full 4-week course that’ll teach you exactly how to set up a successful blog that makes money. But if you aren’t ready to purchase a full course, check out this FREE blogging course, Start A Blogging Business 5 Day Course, it will get you started on the right path in just a week.
hey this is so cute and perfect for the begining of fall! I’m definitely going to follow along to your video and try a painting mysefl. Thanks for sharing!
Sam
SaidbySam.com
I just love your video! Your post makes it so easy to learn how to watercolor! Thank you so much!!
I love when the leaves change color! Thanks for sharing this great tutorial.
So pretty, yet so simple! I love the colorful fall trees, so this painting is something I should do!
That is so cute, beautiful, and yet simple enough that I may actually be able to do!
Beautiful Fall tree! I love water colors but I’m not that great with them.
This would be a great self-care activity. Seems it would be a happy and calming way to unwind!
Great tutorial! Lovely tree!!
What a fantastic tutorial. Loved the short but easy-to-follow video too. I’m already planning for things to do this winter, and I’m going to put some of your projects on my list. They are simple but beautiful!
I’m so glad!
good tutorial, beautiful picture!
I would find it so satisfying to paint using these subtle colors. I’m going to browse through your suggestions for supplies so I can paint along with your videos.
I’m so excited to have you following along with me. I hope my suggestions are helpful! If you haven’t already, sign up for the weekly newsletter so you don’t miss any new tutorials. 🙂
This looks like a very easy fun activity to do. Thank you for sharing!
Beautiful! Thank you for showing us how to paint it.
What a perfect and relaxing fall project- Love it!!
You make it look so easy.
Awe yours is so pretty!!
I love this one! Perfect for our fall homeschool art classes. Looks great for all ages, too.
I love this. Fall is my favorite season and I’m always looking for more fall artwork to put up around the house. And burnt sienna and umber are some of my favorite colors to use for fall colors.
These are so beautiful!
Beautiful! Great instructions, so easy to follow. This is such a great way to relax the mind a bit.
How pretty and creative!
I have to say… you make it look so easy! The picture is beautiful! I’m an artsy type… but my drawings and painting could use work (I deal mostly in fondant LOL).
This looks like a lot of fun. So simple yet elegant. And I love how you give all the instructions for those of us who are beginners. Thanks!
Beautiful! Fall leaves are the best, and your video tutorial is great!
Beautiful. These would make great all occasion cards.
So pretty! I love trees and I love fall. Perfect art to frame for use in the home.
Enjoyed reading the article above, really explains everything in detail,
the article is very interesting and effective. Thank you
and good luck in the articles.
Best regards,
Thompson Hessellund
Wonderful post and I appreciate your hard work.
Best regards,
Thomassen Valenzuela