We may earn money or products from the companies mentioned in this post.
FULL VIDEO TUTORIAL AT THE BOTTOM OF THIS POST!
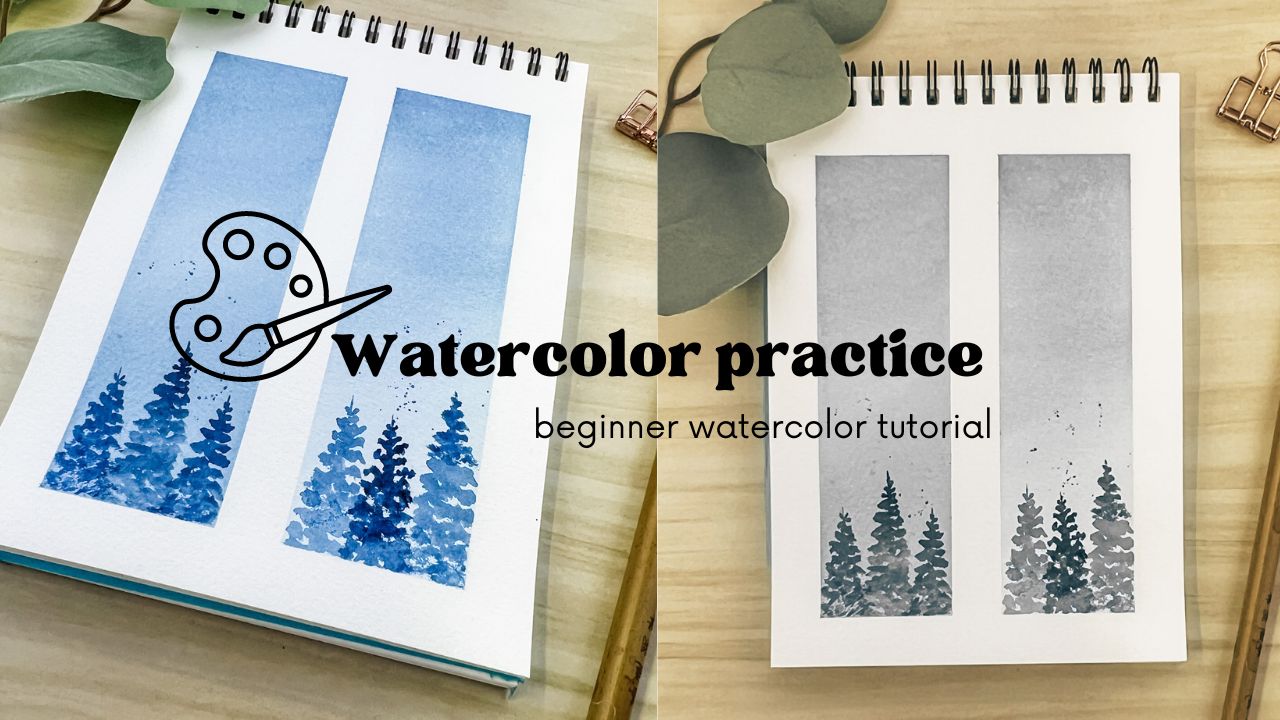
I did use painter’s tape to separate these two sections in my Windsor Newton Journal, but you don’t have to do it. It is nice
So at the very end there I did go back into my paint and I added a little bit more to my brush just to get all the way down the page.
It has the same gradient value and that’s what we want.
While this dries we’re going to go to our other side and you’re just going to get to see the difference between working wet on dry and wet on wet.


Let these two paintings dry and then we’re going to come in with our smaller brush and we’re going to create easy tapping motions to make some trees in our foreground.
Putting those two easy practices together are going to create two very pretty paintings that are really going to make you feel like you can do this!
Then I’m going to go take my Indigo paint right on top of that section that is completely dry, we’re just going to start in the center with out trees. You don’t have to be too precise with this. As I paint downward my paint starts fade a away into a gradient, so I am I’m coming going back into my paint.
I already refilled my paint on my brush and just tapping in again. I’m trying not to go too wide too fast, and it’s okay if there are gaps. These gap will give a natural highlight to the trees.
We are now going to come over to the left side and I’m just going to start painting a medium size tree. And we repeat the same painting process as we did before to create this final tree in our painting.

To finish off these paintings we are going to have a little bit of fun with this practice. I’m going to take a lot of loose paint and I’m just going to tap my brush over my painting to add some fun splatter effects. I enjoy it and I think it adds a little something to a basic exercise. I love to do that with a lot of my paintings just to spice it up at the very end.
and there you have your first beginner project. I will be putting out a series on beginner watercolor tutorials, so either sign up to get all the news on when the new tutorials go live! Everyone on my email list will be the first to know and have access to these tutorials!
FULL VIDEO TUTORIAL

2 thoughts on “Lesson One: Watercolor Wet on Wet and Wet on Dry Practice”