We may earn money or products from the companies mentioned in this post.
Hey everyone welcome back! We are going to jump into doing some gradient watercolor washes. We’re going to do the wet on dry and then we’re going to do the wet on wet.
FULL VIDEO TUTORIAL AT THE END OF POST!
Supplies Used:
Watercolor 140 lb. cold-press paper
Watercolor Princeton snap brushes
Watercolor Paint
- Permanent Rose
- Violet Purple
Two Cups of Water
Washi Tape
Paper Towel
I’m going to go into my palette. I have a decent amount of water on my brush to reactivate it and then I’m going to my
paper towel and I’m tapping off extra water and paint.
Right when you get just like a little dot, that lets you know you have enough water on your brush to get the paint to move. It’s not going to be so much that it’s going to start puddling as you paint. That is just such an important thing to learn as you’re a beginner.
Now I’m just going to go straight into my painting and right when I feel like my paint is starting to go away I’m going to clean my brush off and I’m going to go right into my purple paint and do the same thing.
I’m going to jump right in underneath and I want those two colors to touch while the paint is still wet. Otherwise you’re going to get a harsh line or blooms. That’s why it’s really important to tap your brush off on your paper towel to try to get that exact same water consistency on the brush.
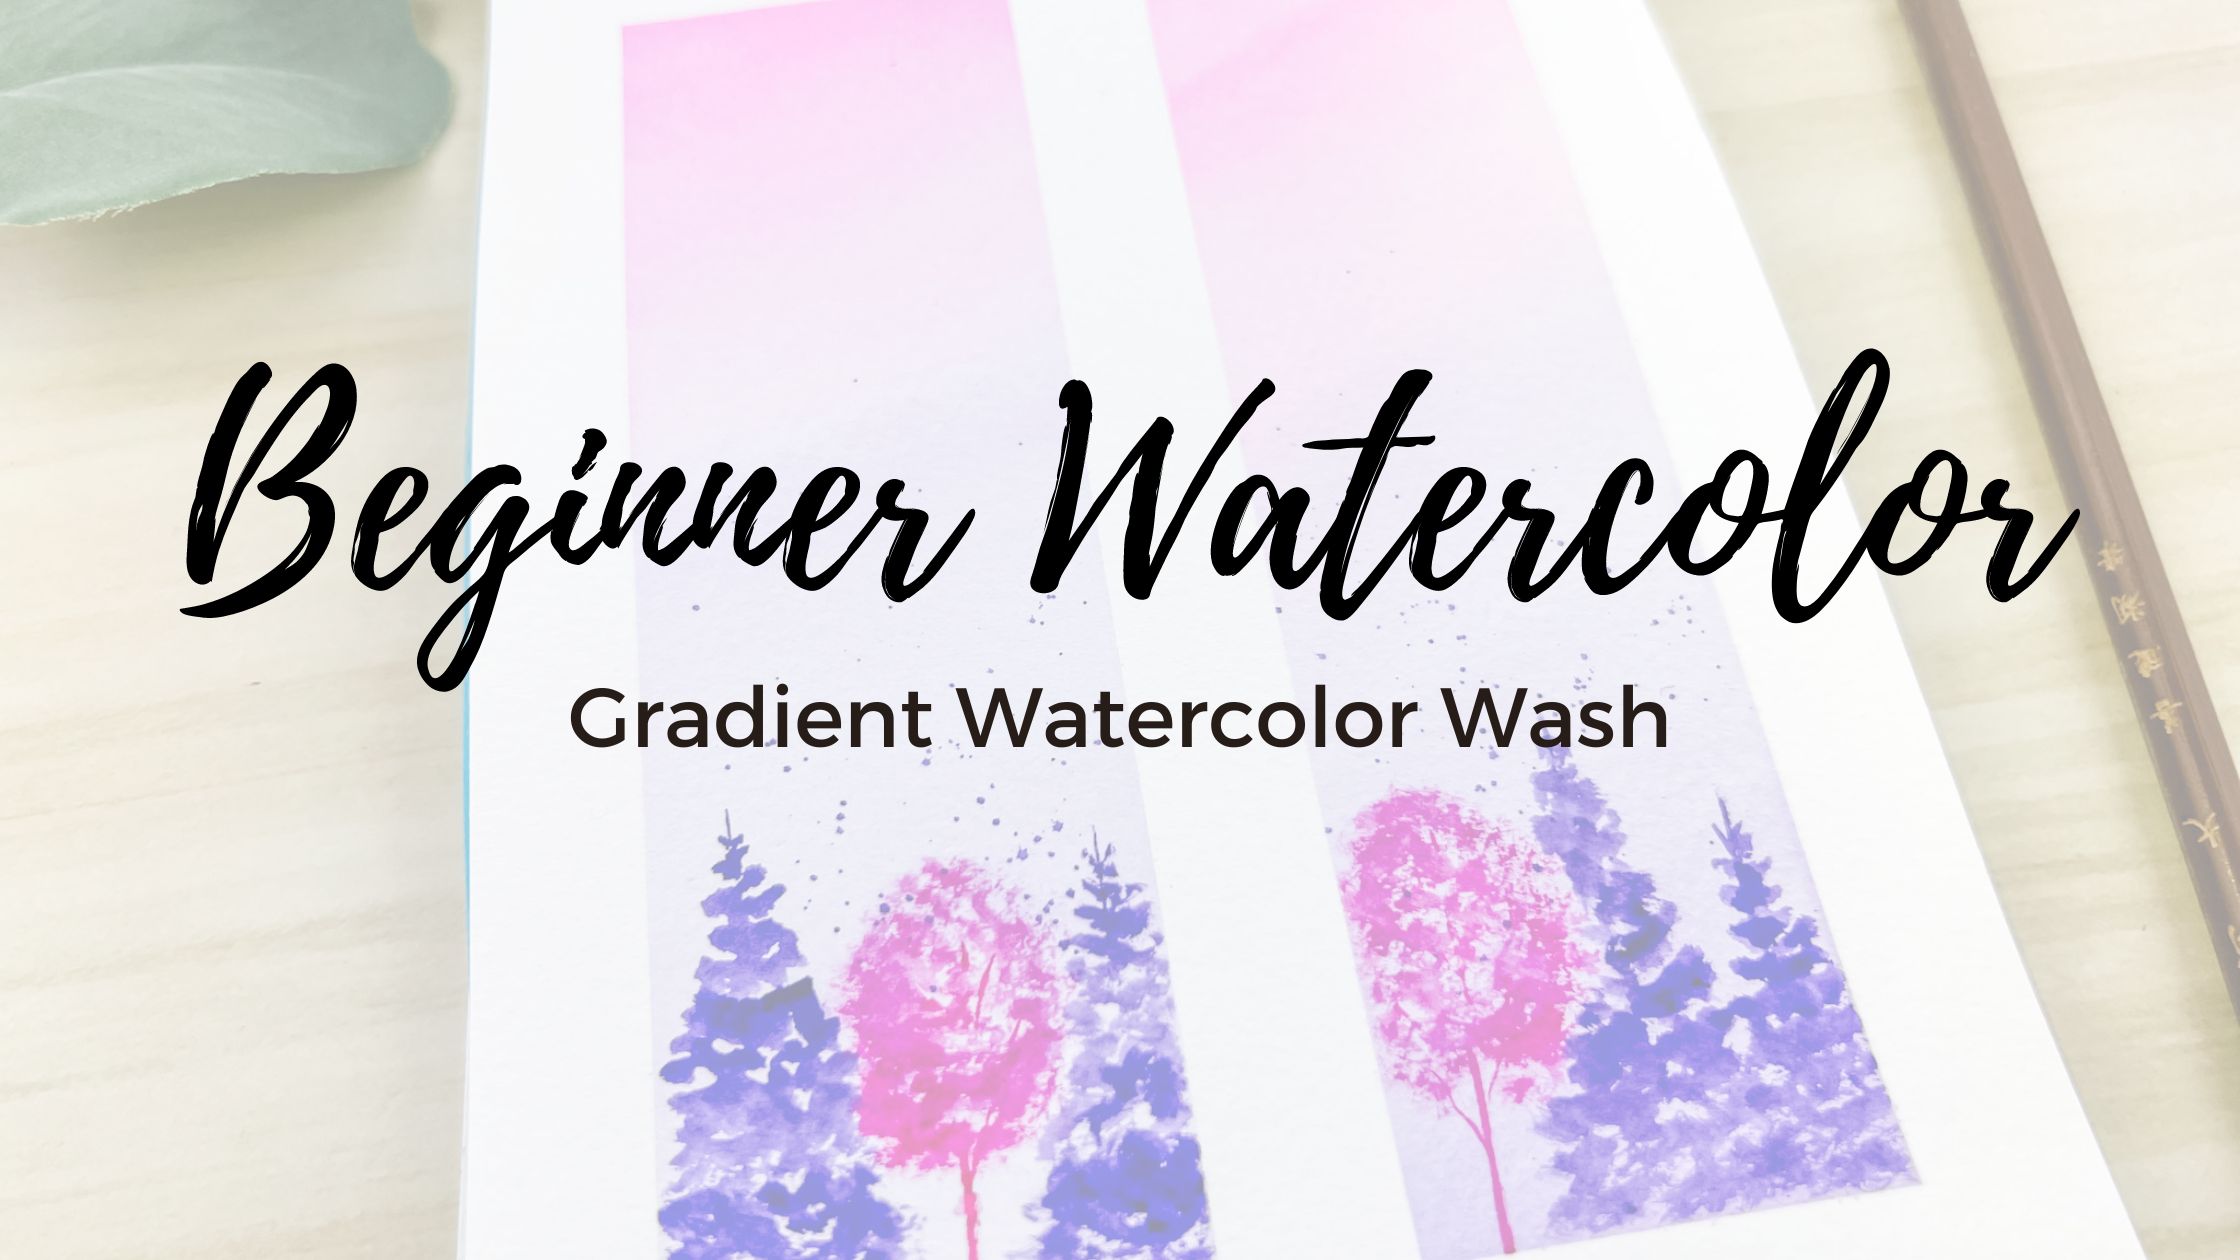
There is the first gradient wash! We have the pink on top and it blends perfectly into the purple.

Let’s clean off our brush and get nice clean water on it. Next, we are going to fill in our other side with the clean water, which is the biggest difference between the two sections. Now repeat the same process on this side of the painting.
I’m going to go into that pink color, and I’m going to start by tapping off extra water on my paper towel. Then we’re going to start in at the top. I like to go angled when I do these kind of like sunsets it helps the painting not feel so flat.
I’m going to come up into the pink and allow these two colors to naturally mix. Work those paint colors back and forth a little bit. And there we have our wet on dry!
Let these both dry, then we’re going to come back in do our tapping motions as exercise but also make some really pretty trees in our foreground.

I’m going to try to get a super dark concentrated purple on my brush (by using a little amount of water) and then I’m going again to tap off extra water and paint.
Now let’s do those tapping motions to create the shapes of our trees. Start pretty high on the far left side and do a quick little line to create the center of the tree you can follow. Next, I’m just going to tap the shape of my foliage on the tree. Keep painting downward till you reach the bottom of your tree.
I’m go back into that pink paint and I’m getting a really concentrated pink on the tip of my brush, and then I’m going to create my tree trunk. Do this by pulling your brush down very lightly using only the tip of the brush. You don’t want the trunk to be too wide.
I’m going to clean my brush and I’m going to go back into my purple paint and we are going to finish this section off with a second ever green tree.
I’m going to start a little bit lower. Again by using those very light tapping motions and I’m going to make it feel like it’s tucked behind the maple tree by not allowing the branches to cover anything.
Once this side is done, repeat the same process on the second half of the painting. Feel free to mix up the pattern of the trees to create a different painting.


FULL VIDEO TUTORIAL
One thought on “Lesson Two : Watercolor Gradient Wash Tutorial”