We may earn money or products from the companies mentioned in this post.
Need Something Cold On A Hot Day?
On summer days it’s nice to go to an ice cream parlor, get out of the heat, and relax with friends or family. But on days when you can’t get out to your favorite ice cream place why not paint? Today we are going to learn how to paint our own delicious, flavorful ice cream cone using watercolors.
Full Video Tutorial
Supplies you’ll need:
- Pencil
- Eraser
- Paint brushes
- Watercolor paint
- Paper towel
- Two cups of water
- Watercolor paper (recommend cold press).
Colors Used:
- Alizarin Crimson
- Burnt Umber (light wash – more water than paint)
Step 1:
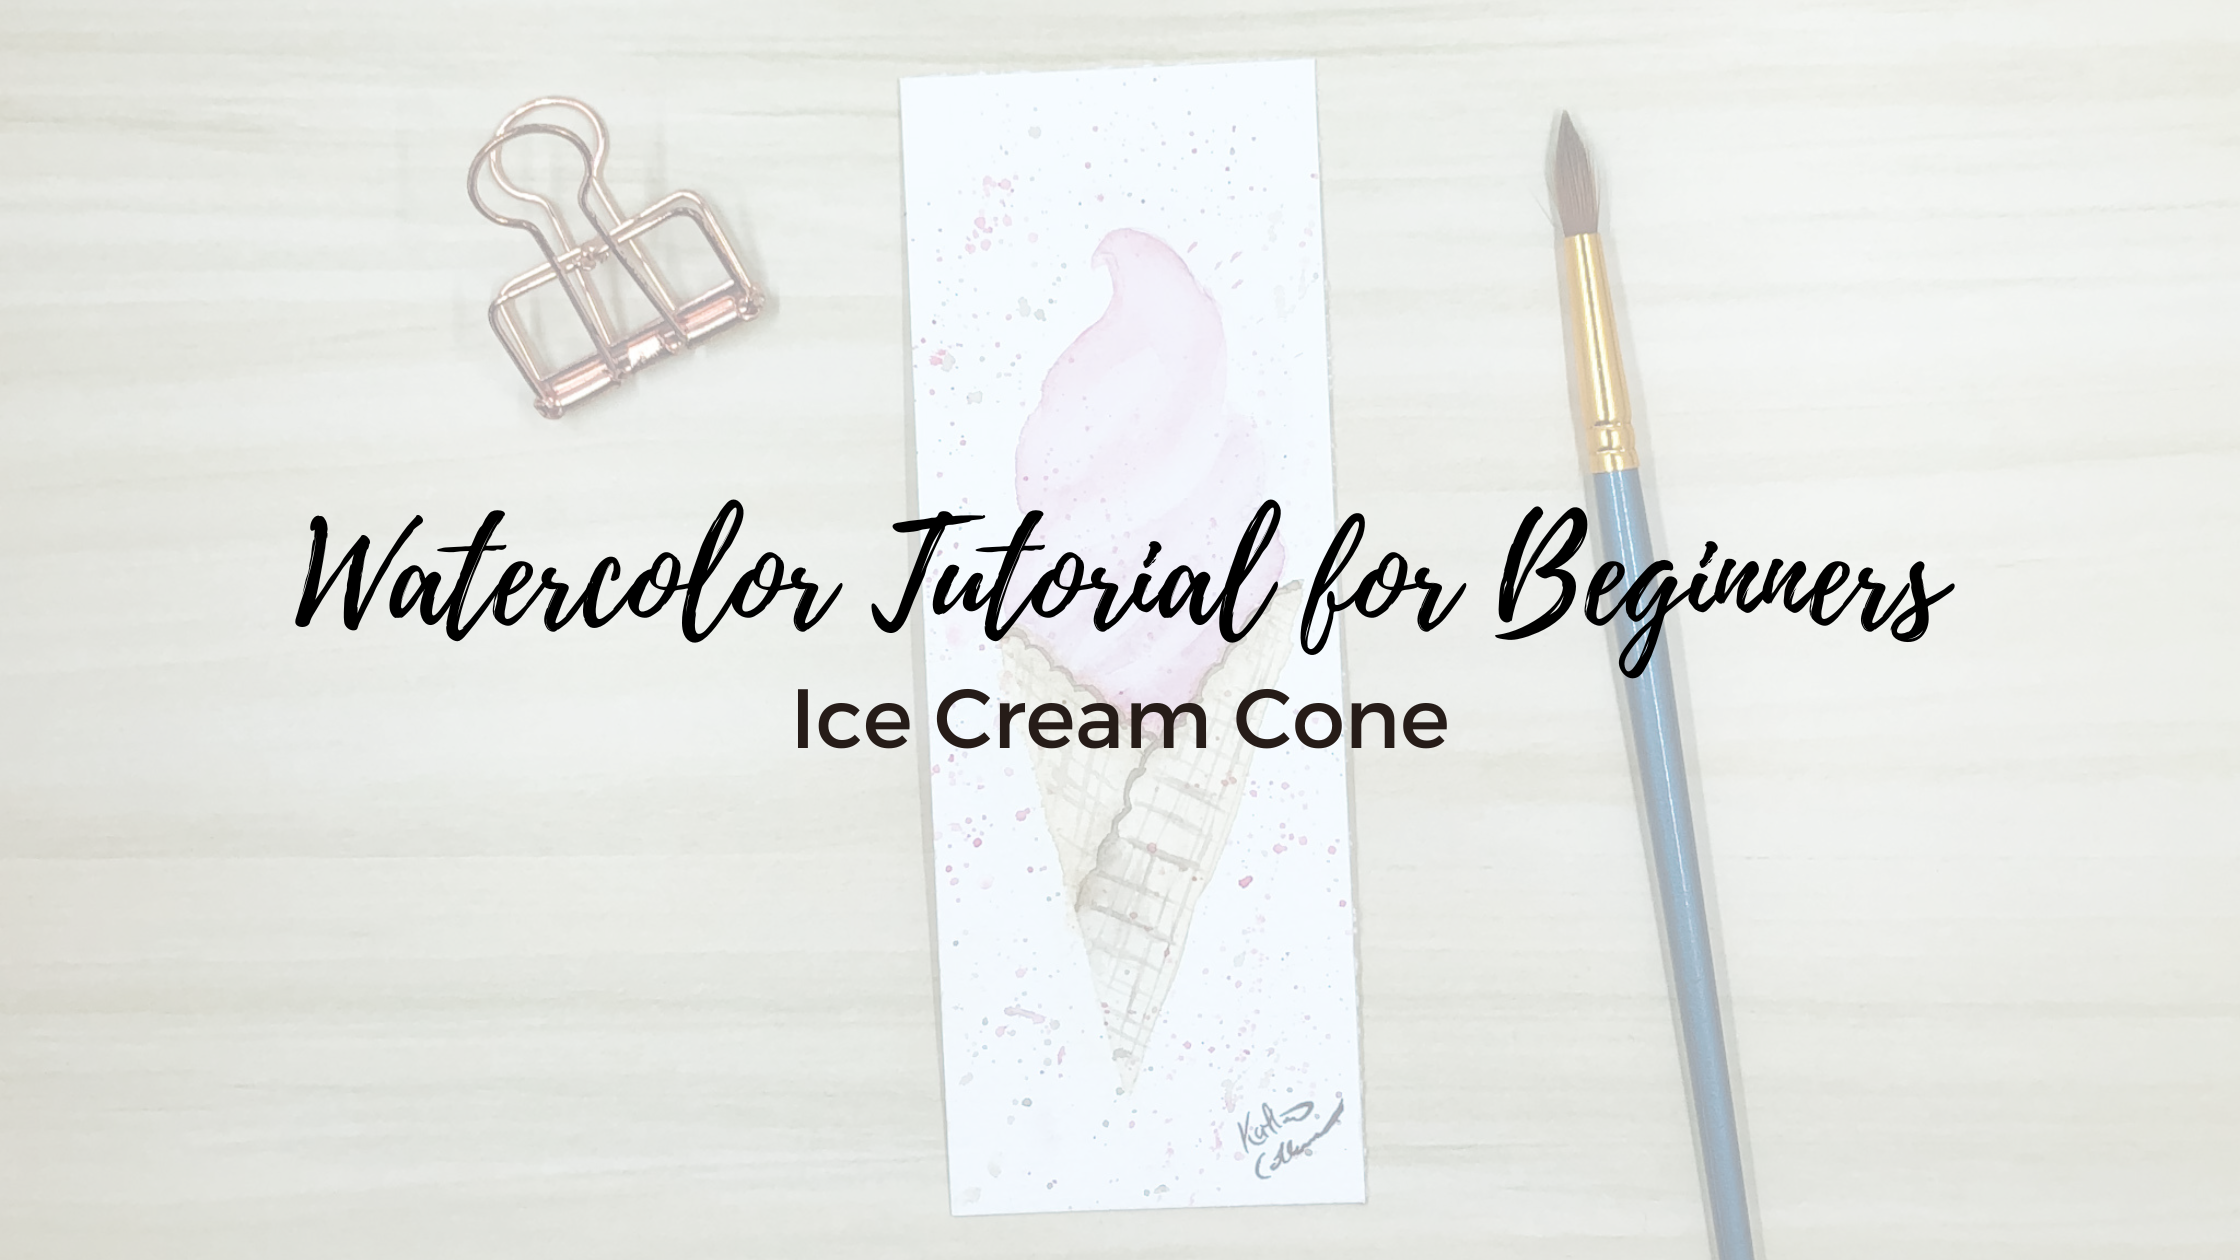
Let’s start with our outline. Use a pencil to outline the ice cream cone. Start with drawing an open upside-down triangle. On top of your triangle draw three curved layers. Make the layers smaller as you work your way to the top. Finish the top layer with a curved point. When your outline is complete erase your lines to where they are barely visible.

Now to begin painting!
Step 2:
The first color we will be using is alizarin crimson. Make a light wash with alizarin crimson to create a pink and use it to fill in the ice cream section of your outline. While your base layer is still wet add just a little more paint to the right side to add a natural shadow.
For the cone mix a little bit of cadmium yellow with the burnt umber paint mixture, and paint an even layer over the entire cone. Once the ice cream section is dry, use burnt umber to paint the outline on the cone’s edges.

Step 3:
This step is a lot of fun! Take your smallest detail brush and dip it in burnt umber. Start on the left side of the cone brushing diagonal lines starting from the right to the left. Then create a checkered pattern by painting diagonal lines from the top to the bottom. Repeat this step on the right side of the cone.

Step 4:
For the final step, we are going to create dimensions on the ice cream. Mix whatever. green you have to your alizarin crimson. Green is red’s complementary color on the color wheel, which means it will darken the light wash of pink we’ve been using to a natural shadow color.
To create a swirl effect to the ice cream you will need to take a small detail brush and make curved brush strokes. Start at the bottom of the bottom layer and make a curved motion upward. Work from the left to the right. Repeat this step on all the layers of the ice cream.

Congrats! You’re done!

I hope you enjoyed painting with me today! Please comment below of what dessert you would like to paint next.
I love your posts! I want to implement all of these watercolor ideas into our homeschool day. They look like really fun, simple art projects.
Another awesome post.. I can’t wait to try this!! My grandchildren love to paint so if I can do it, I know they can!
I always look forward to see what the next piece of art is going to be. I just got some paints the other day for my older son so I’ll have to dig into them and attempt one of these projects!
The step by step instructions makes it seem pretty easy to do 🙂 I’ve never done watercolour before.
I love your step by step directions.
I took a watercolor course last year, and I know that it’s really difficult and time-consuming to get the techniques down.
Your instructions are clear and easy; well done!
Nice! You are so talented!
I love watercolors. You make it look so easy!
I love this! Your step by step makes me think I might actually be able to do this lol
I always wanted to try painting. Your step by step instructions makes this look easy and super fun. I see a new hobby on the horizon. Thanks for sharing.
I hope you’re able to give it a try!
You do a great job with breaking it down into simple, manageable steps. Thank you!
What a lovely painting! I pinned your page to show my daughter. She loves to paint. Thank you. Your blog is beautiful
Thank you! That is awesome to hear. I hope your daughter enjoys it!
I love the layering of the different pinks in the top of the cone. As for what dessert to paint next, something with sprinkles! I think where I always struggle with watercolor is in those tiny details like the lines on the cone, or sprinkles. 😉
You make it looks so easy!
Way to break it down and make it enjoyable!
I am loving these so much! Great instructions!
You are very talented…me…not so much.
What a great way to show someone how to draw!!
That looks easy and yummy.
This ice cream cone is so cute! I’ll share your lessons with my granddaughter. She loves to draw and paint.
I’m so glad you liked it and will be sharing it. I hope your granddaughter likes it!
I love the ice cream cone! Always have wanted to learn to draw, but never took the time. You make it look soooo easy! Loved your website and thankful that you are forcused on drawing God’s creation. He is our best inspiration and thankful that you have a wonderful relationship with your husband and new daughter. You two are so cute! God bless and I pray you have great success with your website and life together. Take care and stay safe.