We may earn money or products from the companies mentioned in this post.
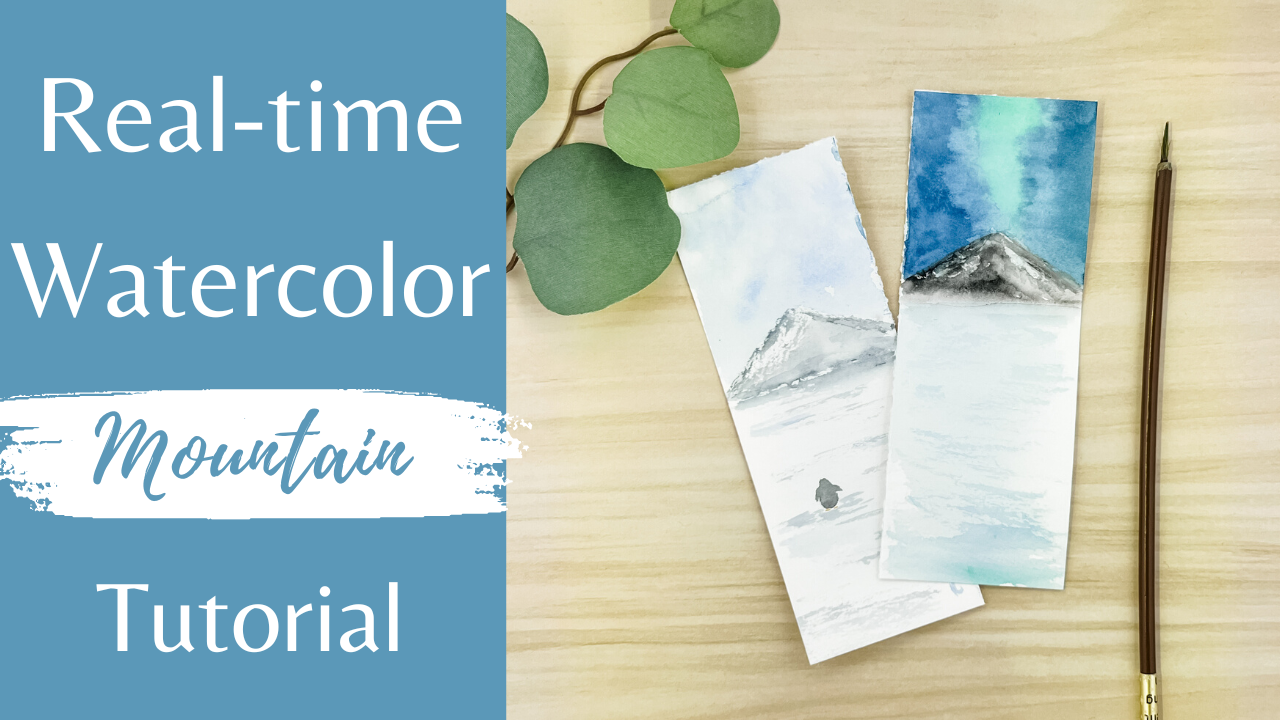
Have you ever wondered how to paint an easy realistic looking mountain with watercolor? Then you are in the right place. Today, I am going to show you how to paint a daytime watercolor mountain, as well as an evening watercolor mountain. Let’s dive in!
Full Video Tutorial
Supplies Used:
- Watercolor Paper (140 lb. Cold-Press Paper)
- Watercolor Paint
- Large, Medium, and Small Rounded tip Paintbrush
- Cup of Water
- Paper towel
Paint Colors Used:
- Payne’s Gray
- Cobalt Blue
- Black
- Yellow Ochre
- Indigo
- Viridian Hue
Day-time Mountain Bookmark:
To begin our first painting we are going to get some Payne’s Gray paint on our medium round brush. Then (the most important step!) we are going to drag our brush on our paper towel and allow a lot of the paint and water to absorb into the paper towel. Then we are going to take our “dry brush” and drag it, or scratch it, along our paper towel in the direction of the shape we want our mountain to be in.
The key is leaving a lot of white space to give the mountain normal highlights.
Next, you can blend out the bottom section of the mountain using more water on your brush.

Once, the mountain is done we are going to fill up the entire sky area with the Cobalt Blue paint. Use different amounts of paint to add variation in the sky, which will give the appearance of clouds. Then before the sky dries, lightly splatter clean water over the sky. Once the water dries it will give the appearance of snow.
Next, we can use the same technique we used on the mountain on the snow for our foreground.
Take a light wash using the Cobalt Blue, and scratch in the paint against the texture of the paper. To keep the perspective correct use lighter paint closer to the mountain and slightly darker paint toward the bottom of the page.
Now we are going to add a cute little penguin to our landscape. We are going to add a little black oval shape using black paint, then add tiny little ovals coming off of the main oval to make up the penguin’s arms. Then switch to yellow ochre paint and paint in two little dots under the oval to make up the penguin’s feet.
Lastly, take some more Payne’s Gray paint and add some shadowing underneath the feet of the penguin.

Night-time Mountain Landscape:
Switching now to the night-time landscape. We are going to switch to black paint, and we are going to rub our paint brush on our paper towel to take a lot of the moisture away. Then we are going to scratch our brush against the texture of the paper in the shape of our mountain. You still want to keep the white of the page for a natural highlight even on a night-time mountain.

For our sky we are going to use Viridian Hue and paint it down the center of the page (kind of angled and loose shape not a perfect shape by any means). Then, while the green paint is still wet using Indigo paint fill in the remainder of the sky. Combining these two colors will create a beautiful northern lights evening sky.
Using a very light wash with those same sky colors add in just a little bit of the paint to to white section of the top of the mountain. This will add some natural shadowing on the snow.
Then lastly, use the same colors in the sky to add the shadowing to the snow if the foreground the same way we did in the last bookmark.
Once all of the “dry-brush” marks are done and dry. Use a very light wash using the Indigo paint color and fill in the majority of the snow. Leave just a little of the white page white as well as making sure the dry brush texture can still be seen.

And there you have two mountain landscapes using watercolor!
You may also enjoy painting a Watercolor Ice Skater if you enjoyed this winter themed tutorial.
If you haven’t already signed up to be a part of my email list to be notified when new tutorials come out. You can do that anywhere on my website. Hope to have you come back for more watercolor tutorials! Bye!