We may earn money or products from the companies mentioned in this post.
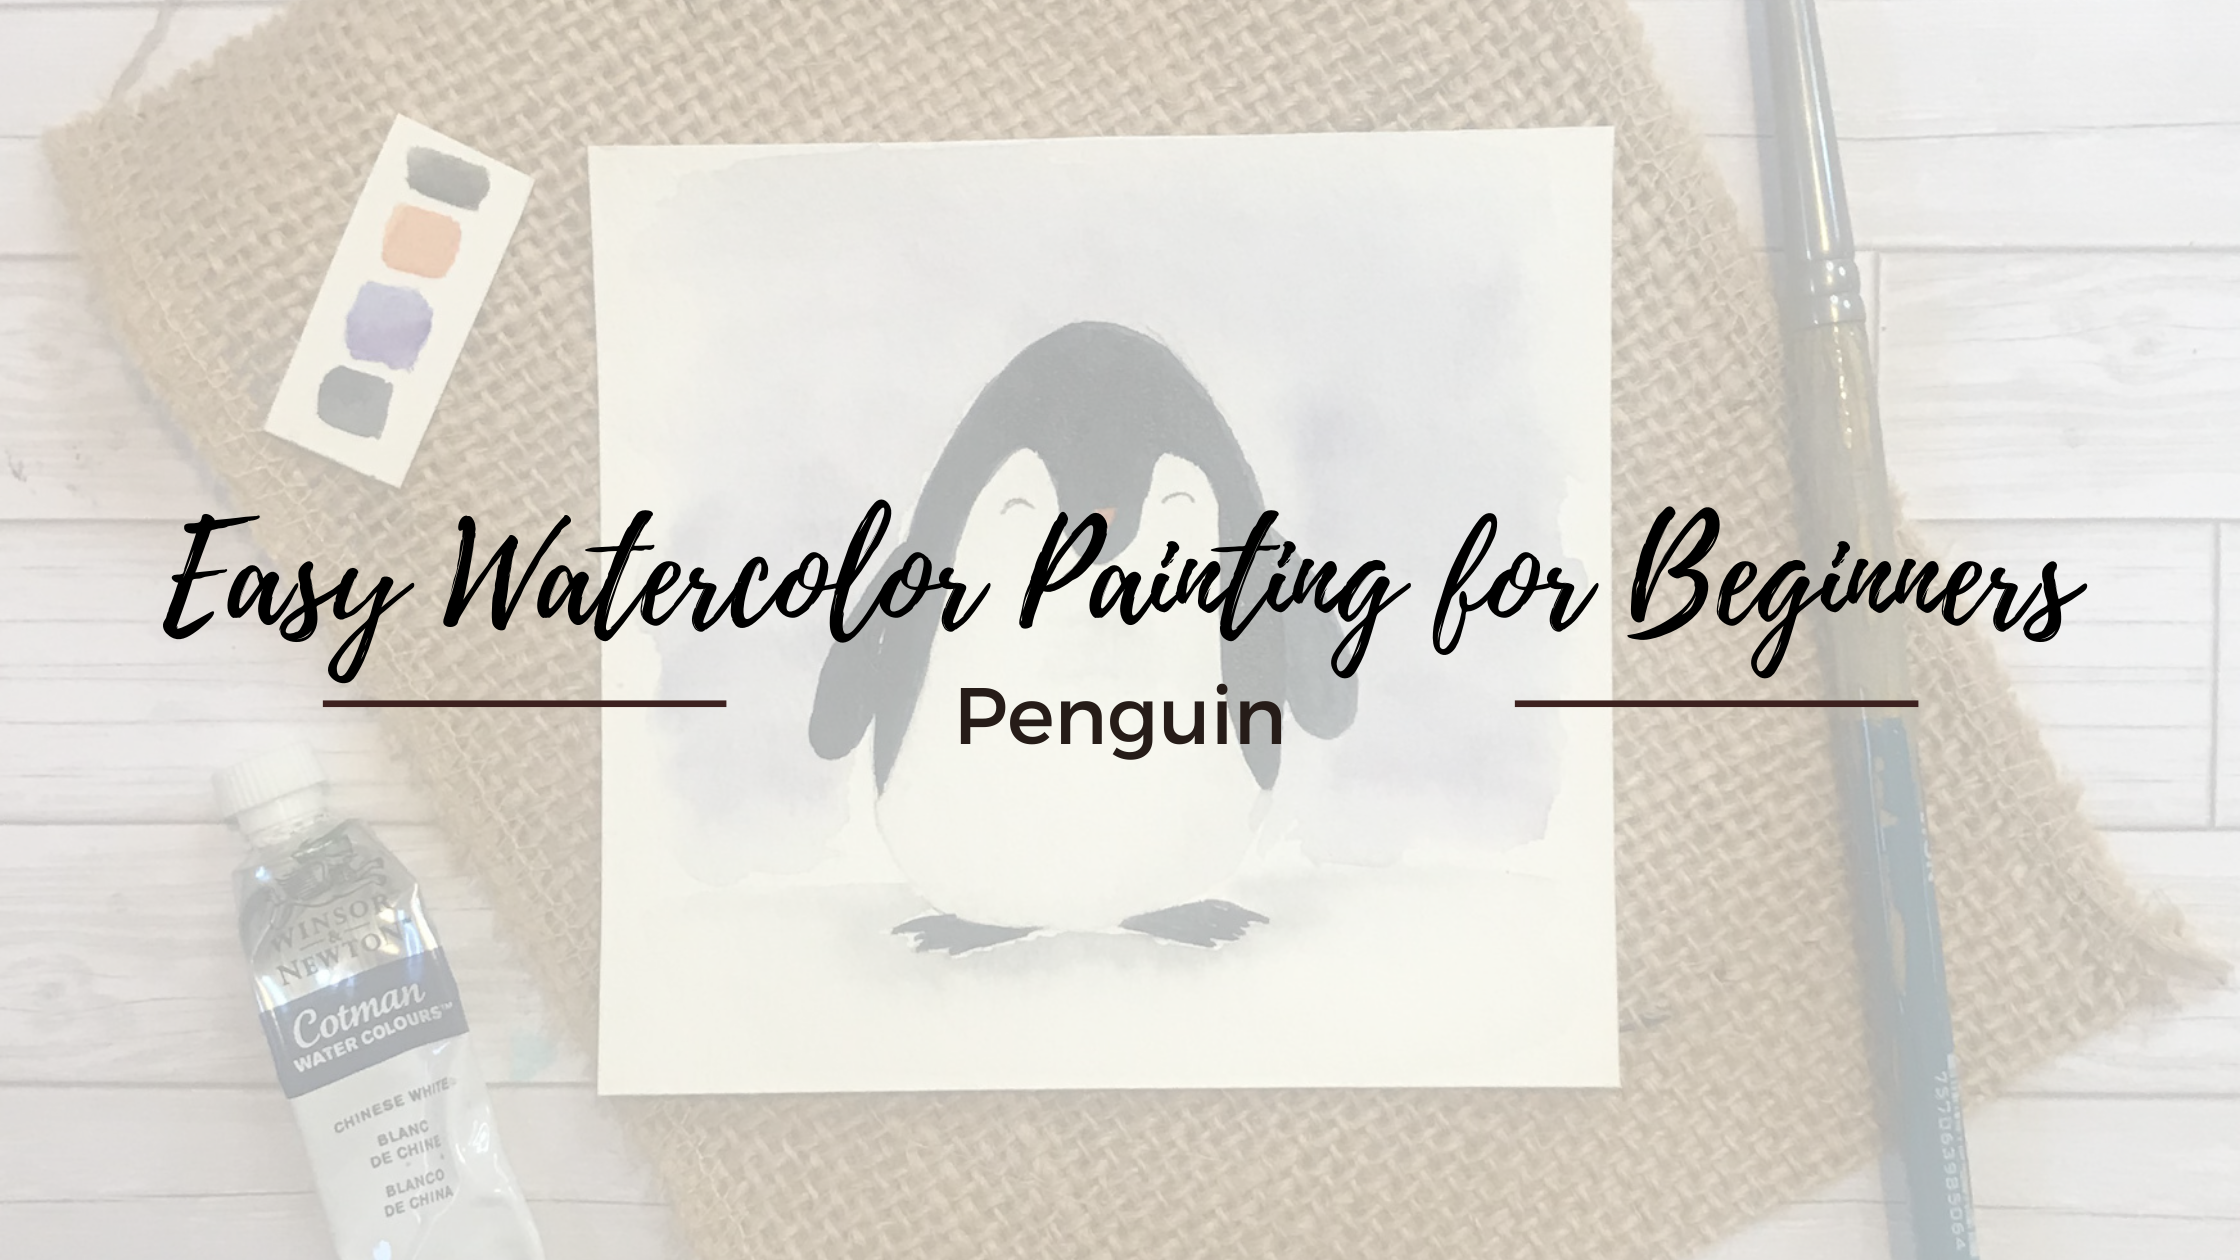
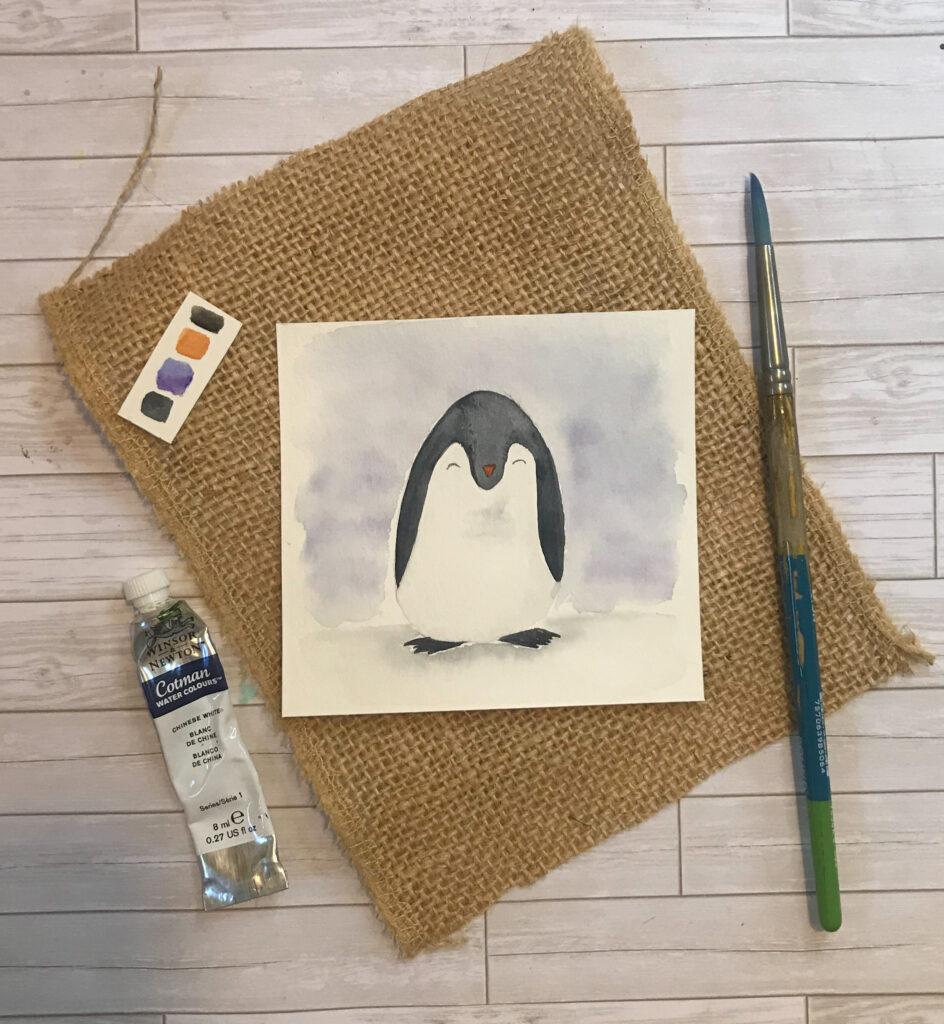
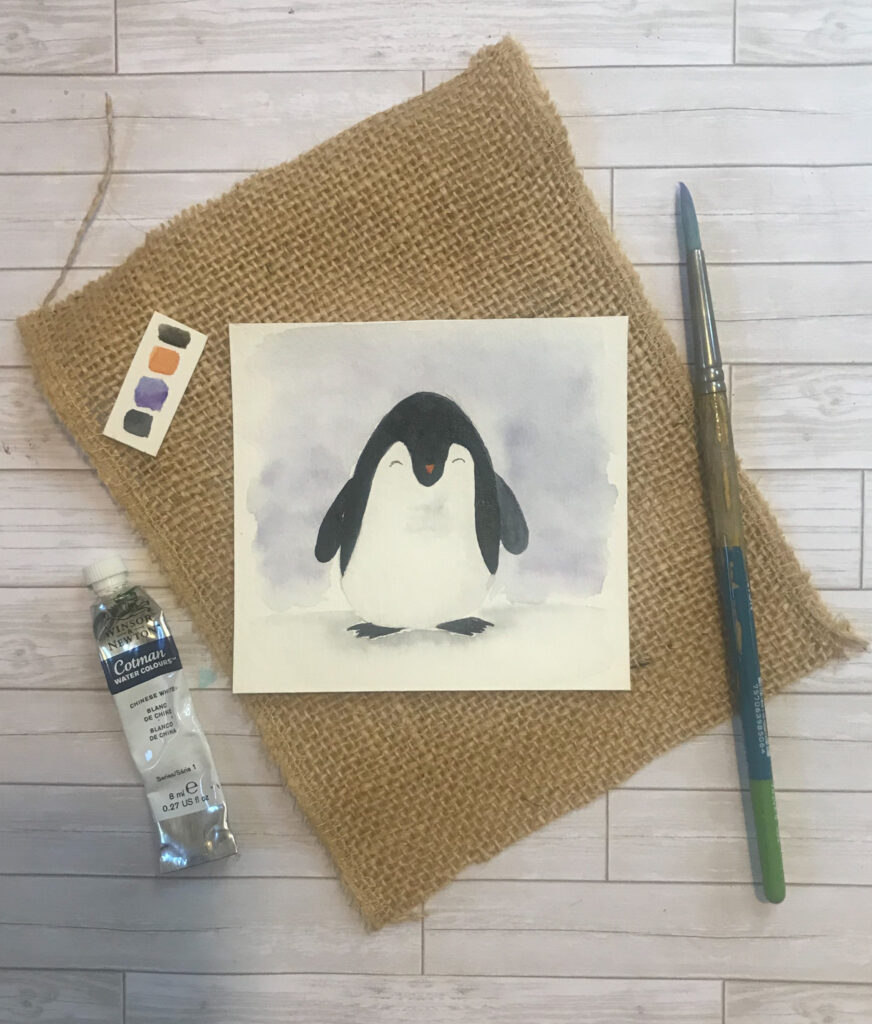
Here is an easy watercolor painting for beginners. I will walk you step by step on how to paint a cute watercolor penguin. This is a perfect watercolor painting to put on a Christmas or winter greeting card.
Let’s dive in and see how it’s done!
Full Video Tutorial at the Bottom of this Post!
Supplies you’ll need:
Watercolor Paper
Watercolor Paint
Round Paint Brushes
Two Glasses of Water
Paper Towel
Paint Colors Used:
Payne’s Gray
Burnt Sienna
Ultramarine Blue
Violet
All of these colors can be found in this perfect beginner set of watercolor paints. This is the exact set I am using in the video above to create this painting. I highly recommend this product to you if you are looking for a beginner set of paints.
Step 1:
The first thing we need to do is draw out our penguin.
I recommend in all my blog posts and videos is that you draw your sketch on a seperate sheet of paper then transfer your sketch over onto your watercolor paper. For more details on how to do this check out, How to Trace a Picture onto a Canvas.
Grab your pencil and draw an egg-like shape for the penguin’s body. For the penguin’s face, start about a third of the way down your penguin and draw an “m” like shape. Make sure you leave space for the beak in the center of your “m”.
Draw a small upside-down triangle in the center of the penguin’s face for the beak.
Create small upside-down semi-circles for the eyes.
On either side of the penguin’s body draw little carrot-shaped ovals for the arms. Feel free to have fun with your penguin’s personality here. They can go in any direction you’d like.
Lastly, for the penguin’s feet draw two squares with three triangles pointing out. Putting these shapes together will give the appearance of webbed feet.
Step 2:
Once your penguin is sketched or traced onto your watercolor paper we can begin painting it in!
Dip your round brush into your Payne’s gray paint and begin painting in the entire “m” shape we drew as the penguin’s face. Leave the beak are white.
Jump down to the penguin’s feet and using the same paint color, paint in the feet area.
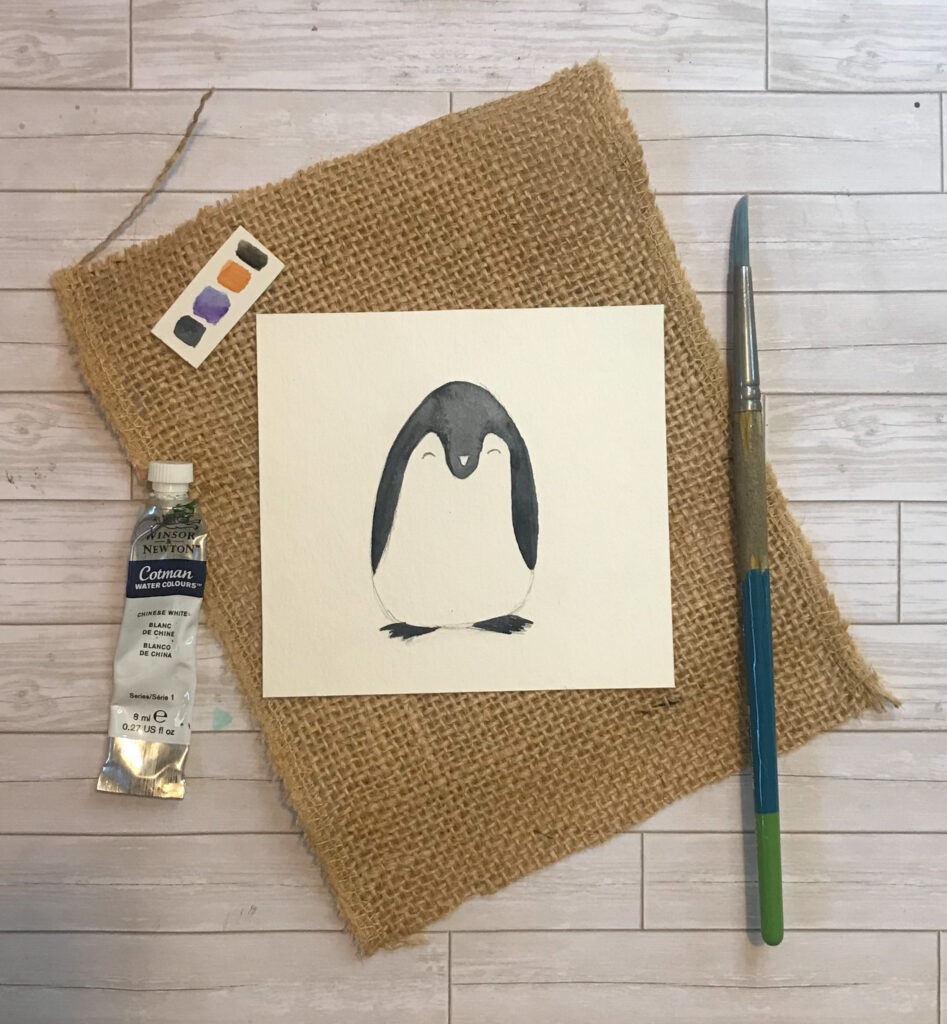
Step 3:
Next, create a light wash of Payne’s Gray, by adding more water than paint to your mixture.
Once your first layer is dry, use clean water to create a gloss over the penguin’s belly. Use your light wash of Payne’s gray to add shadow to the outer edges of the penguin’s body as well as the center of the penguin.
Adding Payne’s gray will give shadow and depth to the penguin.
While the belly area is drying we can go ahead and use Burnt Sienna to fill in the penguin’s beak.
Step 4:
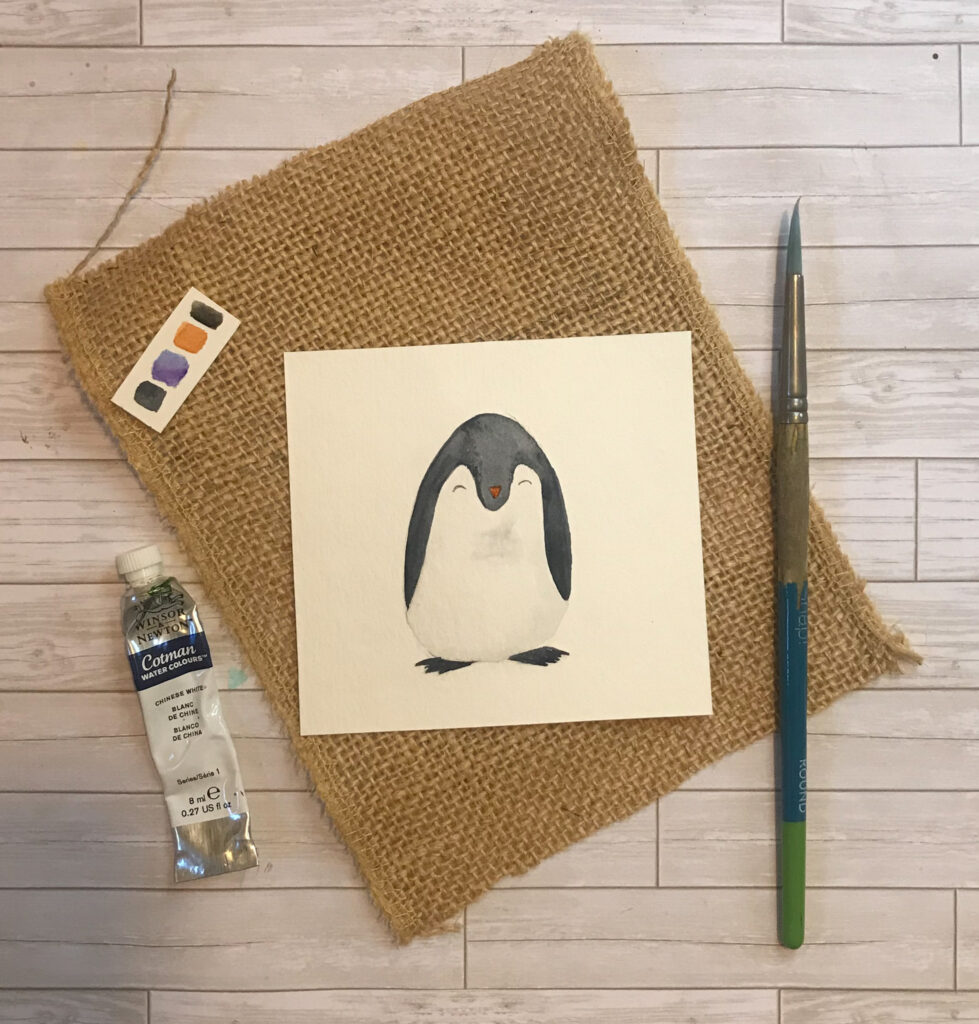
Let’s add some ground for our penguin to stand on.
Use clean water to add a gloss of water under and slightly behind the penguin’s feet. Then tap in a light wash of Payne’s gray. Add a little bit more paint to the mixture to create a darker tone of Payne’s gray then tap that color in right below the penguin’s feet for shadow.
Let this layer dry before adding the sky.
Step 5:
Again, we are going to add a layer of clean water to the sky area all around our penguin.
You want to apply your water messily, without allowing the water to touch the penguin.
Mix Payne’s Gray and Ultramarine blue to create a Navy color and begin painting that color all around the wet surface. Then, while the sky is still wet drop in some violet paint, and blend these two colors.
Let this layer completely dry before moving on.
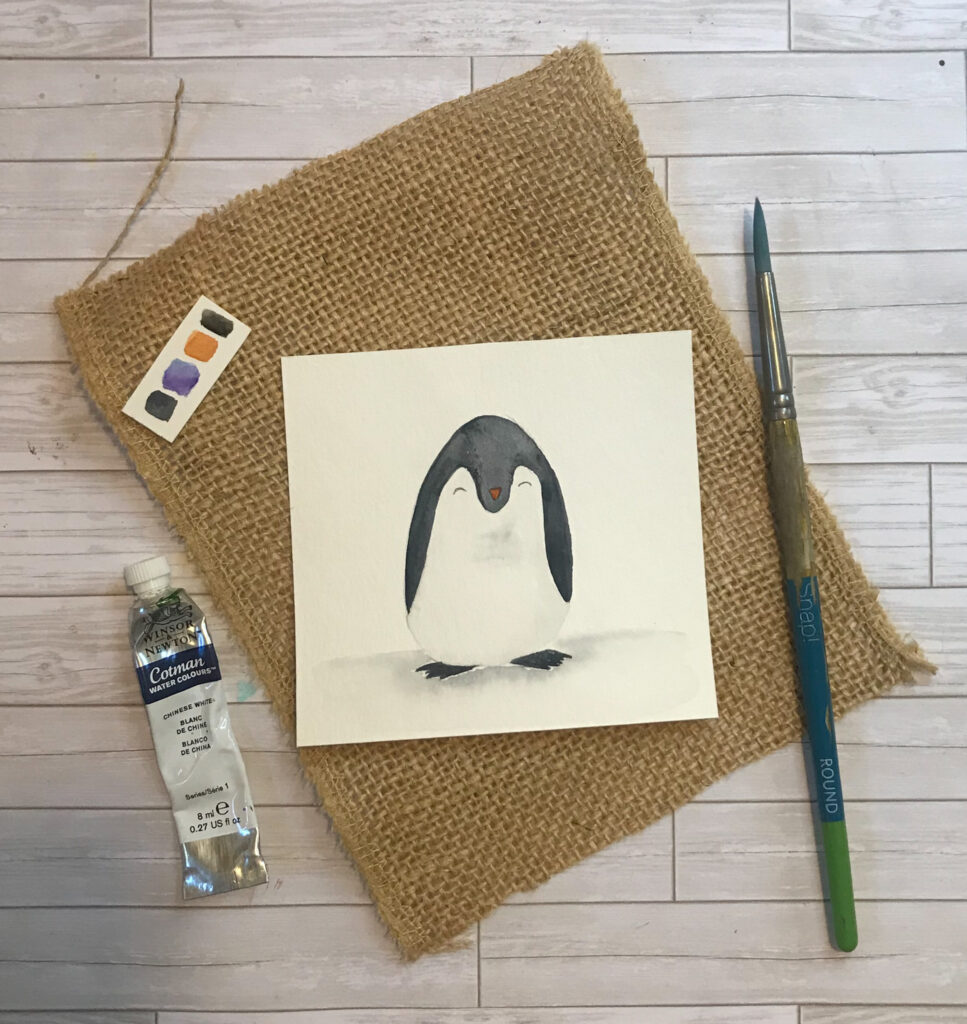
Step 6:
As I was painting I realized I forgot to add my penguin’s wings… oops!
So, now that all of our previous layers are dry, let’s go ahead and add them.
If you like you can draw them in first, but I am going to go ahead and just use a dark mixture of Payne’s gray to paint them in.
As I mentioned in the drawing section of this tutorial, the arms are carrot-like oval shapes. I am going to simply place a wing on either side of my penguin face downward at a slight angle.
Once your penguin dries, you’re done!
I hope you enjoyed painting this easy watercolor painting for beginners tutorial with me today!
Full Video Tutorial
Here are some more tutorials you may like:
Easy Watercolor Painting Watercolor Penguin
Easy Watercolor Christmas Card Tutorial | Christmas Truck
Before you go sign up for our free newsletter! In the future, we will send you a few emails a month on watercolor painting, DIY crafts, acrylic painting, and/or blogging tips. Let us know by selecting which ones you would be interested in. You can unsubscribe at any time by clicking the link at the bottom of every email.
4 thoughts on “Easy Watercolor Painting for Beginners | Penguin”